


IKEA PAX turned built in wardrobe
- Tara Salas
- Jan 4, 2024
- 4 min read

In my ongoing quest for functional organization and elimination of visual clutter I decided to use a wardrobe in place of a traditional dresser. I realize this is common in many parts of the world but here in the Midwest, a traditional bedroom set consists of 1-2 dressers, a bed and nightstands. Making use of the vertical space adds storage and removes the clutter that tends to accumulate on the dresser top.
I started this whole process by using this PAX planner on the IKEA website.
I already knew the measurements of space and used the planning tool to pick the units that would best fit. For my exact space I ended up with three wardrobe frames (19 5/8 x 13 3/4 x 92 7/8).

After choosing my frames I played around with different configurations of drawers and shelves. This is ultimately the design I ended up choosing.
9 Drawers
8 shelves
3 mesh baskets
1 pull out shelf
1 pull out pants hanger
1 clothes rod
I ordered the plain front Forsand doors.
The grand total with delivery to my area was $1200.

Assembly was as expected. I watched a few YouTube videos first and then followed the instructions. I was able to assemble and install everything by myself. It took about 6 hours total.
Tools required:
-drill
-hammer
-level
-clamps are helpful!!

I removed the baseboard from the wall behind this unit and then mounted it on a 2x4 base. The base just adds enough room on the bottom for baseboards.
The floors and walls are most likely not square so check for level and add shims if needed. If the unit is installed level, the doors will hang properly.

The units come with mounting brackets to secure these to the wall on the top corners of each unit. They also connect to each other and come with the screws needed for that too. I was actually pretty impressed with how easily this all came together.

All the drawers were easy enough to install and with the pre-drilled holes there no additional measuring or leveling needed. It's really just adding screws into the holes where you want your accessories.

After hanging the doors I added trim to make it look a little more dressy. I could have done this before hanging the doors but I wanted to visualize as I decided where to put my trim. I used chair rail for the larger box trim and a decorative thin trim for the inside box. This is where the customization comes in. You could choose whatever combo you like!
Chair moulding : https://rstyle.me/+XFK9siElbeyYTph5wyT0FA
Ornamental trim:
You can add both of these to curb side pick up if you don't love walking around the hardware stores searching for the right trim pieces.
I used brad nails and glue to attach these. A pin nailer (small gauge nail) would have been nice but I don't have one :) Glue or double sided tape could be used without a nail gun too.

After the trim was added to the doors I filled the nail holes and caulked the edges. This is one of my least favorite parts but it makes a big difference!
IKEA furniture is a laminated particle board and if not painted properly, the paint will peel. I use the BIN shellac based primer for the laminate furniture and have great success. I always do two coats of primer and a light hand sand between coats.
Primer: https://amzlink.to/az0HC4mP8nr5M

All primed and ready for paint!

I used Benjamin Moore Advance paint in color Dove Wing to paint the unit. This is the same color as the walls but in a cabinet grade paint with satin finish (walls are eggshell). You may be wondering why I didn't just get the unit in white if I was going to paint the gray unit. I would have but it's been out of stock for months as I was planning this project. The gray was in stock with everything I needed and I was ready to move forward with the project now. I would have painted after adding time even if I went with the white unit so I don't think it ended up being a big deal.
I used a combination of 1x3 boards, 1x2 boards, cove moulding to trim the unit in and make it look built in.

I started by attaching the side pieces of trim with Brad nails.

The top piece of 1x2 trim is attached only at the ends to the 1x3 and why it's important those trim pieces go all the way to the top. Then the cove moulding attaches to the ceiling and then a few nails attach the cove moulding to the top 1x2 trim piece. The door still fully open and close without interference.

Then I added trim to close the gap at the wall. I decided not to put the unit directly against the wall so the door could have full extension.
I filled all the new nail holes, caulked again and painted it all. I still have to add the baseboards on the bottom 🤫
I liked the look without handles so I added these push-to-open latches and they work great!
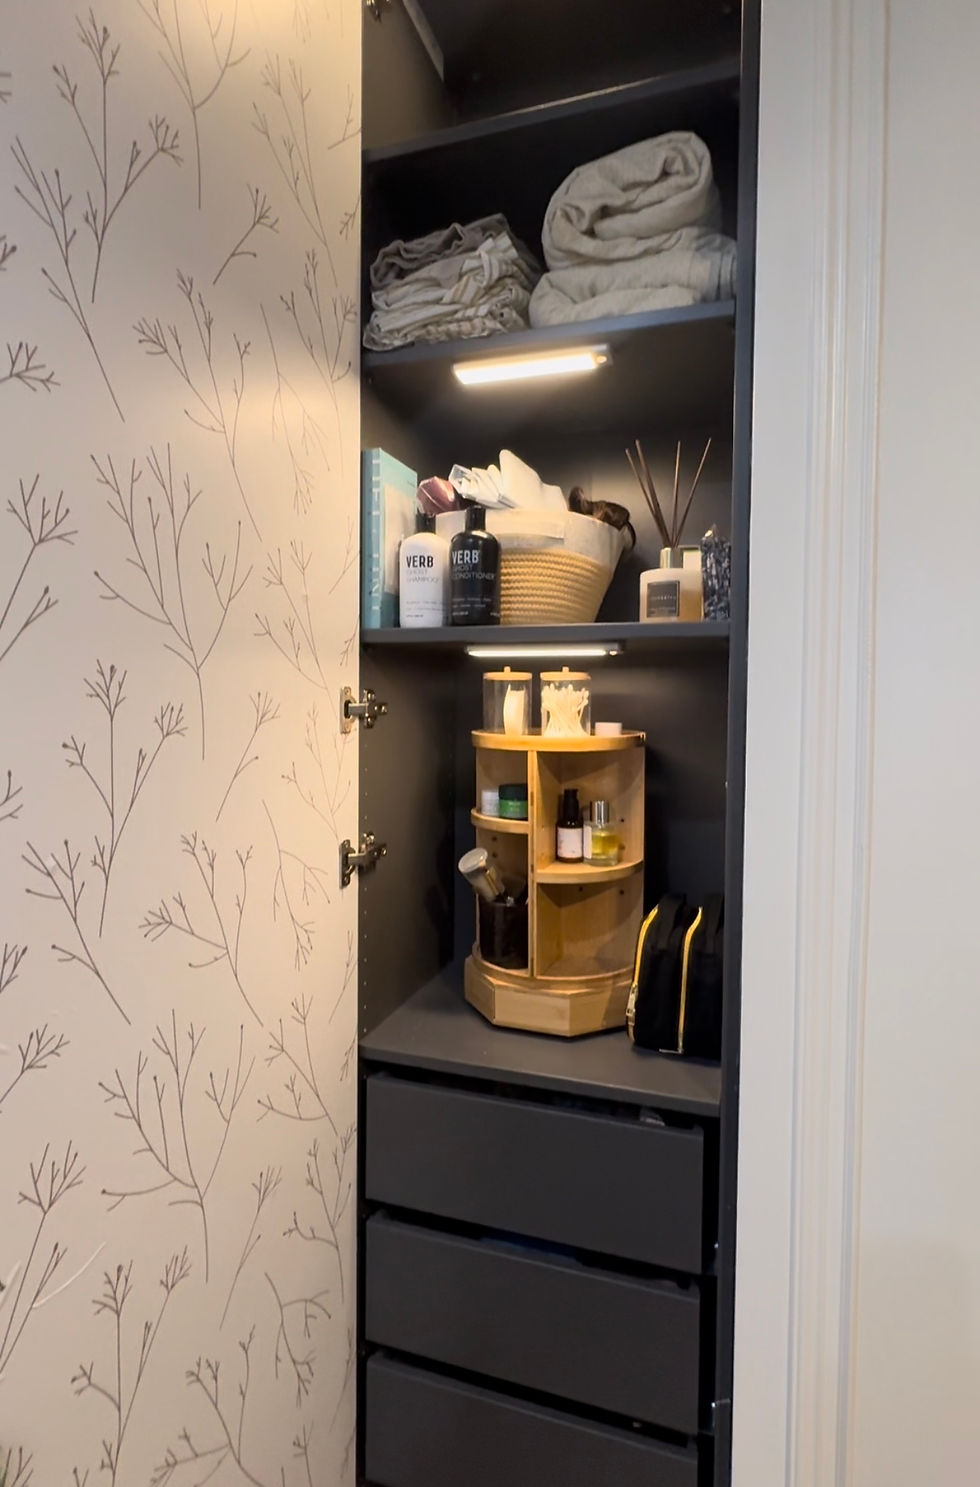
I added a peel and stick wallpaper to the inside of the doors for a fun detail. I also used these motion activated rechargeable lights and they are perfect!
IKEA sells lights for these units but I found them kind cluncky to install and these were much easier.
Cabinet lights: https://amzlink.to/az0YGxy4uJ4da
Wallpaper: https://amzlink.to/az0oZFNcMsFwg
Organizers: https://amzlink.to/az0zPnaagxes9


I'd love to answer other questions you have so please reach out!
This is one of my favorite projects to date and one I would recommend without hesitation.
Happy building,
Tara
Komentarze